This time of year, it is important to us to show our appreciation for some of the many non-profit organizations that help conserve and protect the important biodiversity of our region, provide invaluable environmental education, and make the region a better place to live and explore.
Klamath-Siskiyou Native seeds is a small, rural, woman-led business that has a commitment to be ecologically and socially responsible in our business practices and to give back to the land and community that make our region so special and unique.
While providing native seeds for native plant and pollinator habitat restoration projects, running our business off of solar energy, and volunteering our own personal time for conservation and environmental efforts demonstrates our commitment to running a sustainable business and lifestyle, it is also important to take that commitment one step further and provide donations to non-profit organizations and community efforts that do amazing work in our region.
Siskiyou Field Institute‘s mission is to increase the understanding of, and connection to the Klamath-Siskiyou ecoregion through education, scientific research, and public engagement. They provide field based learning in and about the Klamath-Siskiyou Region.
Applegate Siskiyou Alliance works to sustain the integrity of the environment and human communities in the Applegate Valley and surrounding areas through education, collaboration, community activism, stewardship and science. They promote wildland conservation, ecological restoration, a sustainable rural economy, and community engagement in federal land management planning.
Pollinator Project Rogue Valley envisions communities and landscapes working together, supporting diverse ecosystems rich with native plants and thriving wild pollinators. They inspire, engage, and educate about the ecological importance of wild pollinator species and the diverse native plant communities essential for their survival. They are committed to the creation and restoration of pesticide-free pollinator corridors throughout the Rogue Valley. The Pollinator Anthology is a book and creative arts anthology focused on local pollinators.
Siskiyou Mountain Club’s mission is to restore, maintain, and promote primitive trails in the Siskiyou backcountry and beyond. They coordinate stewardship projects with volunteers, staff, and interns; publish maps and outdoor information, and lead service-adventure for the public. They coordinate with staff, volunteers, interns, and other partners who do the hard work it takes to keep trails from disappearing from the remote corners of Southwest Oregon and Northwest California. They participate in trips of varying length and put the labor in to keep our trails alive.
If you live in southwest Oregon or northwest California, this upcoming native plant sale in Phoenix, Oregon, hosted by Pollinator Project Rogue Valley, is a great opportunity to purchase native plants for fall planting! KSNS will have a booth and we look forward to seeing you there!
Suzie collecting Tolmie’s cats ear (Calochortus tolmiei) seeds at low elevation. These seeds need to be collected before they all drop, since the seed pod hangs down, so timing is important!
Each year we start collecting seeds in May and usually wind down at the end of October, or in some years into November, depending on fall weather. That means that we are collecting seeds for half the year, every year! We start in the low country and work up in elevation as seeds ripen in the high country, but even at low elevations there are late-blooming species that ripen late in the summer or early fall. Right now is probably the peak of seed collection, as both low elevation and high elevation species are on!
Each year the timing of seed ripening for specific species changes a little. This year we had a wet, cool early start to summer and native seeds have matured a little later in the low country, but have been pretty similar to the average seed collection times in higher elevation areas. We keep detailed seed collection data on the location and date of when and where we collect our seeds to make future seed collection trips more successful and to help us hit the right time to collect seeds.
Coast man-root or wild cucumber (Marah oregana) fruits contain large seeds. We’ll have a few packets of this species available this fall.Collecting warrior’s plume (Pedicularis densiflora) seeds in the low country. We’ll have this species back in stock this fall!
We have been busy in the field this summer and haven’t had time to do much writing or computer oriented tasks — of course, we’re still getting your seed orders shipped! — as we work hard, drive and hike far out in the backcountry, and collect seeds, often on steep terrain and off-trail, in the heat of summer, to bring you the seeds you need to meet your native seeding and planting goals.
Each year we are excited to offer a few new species to our growing list of diverse native plants seeds, from a wide variety of habitat types, and this year is no different! We’ll have some new, exciting species this year, as well restocked availability for popular species that have been out of stock for a while.
Mountain arnica (Arnica latifolia)Suzie collecting arnica seedsMountain arnica and bumble beeMountain arnica (Arnica latifolia) seeds ripening. We will have mountain arnica back in stock this fall!
Be patient with us as we get our inventory updated as we are also busy cleaning and packaging seeds! Our trusty Dybvig and Clipper seed cleaning machines have been working away, helping us clean our seeds for packaging. Cleaning seeds is time and labor intensive, but also enjoyable! You really get to know a plant when you clean its seed and look at the seed in detail, observing all the parts that make it particularly adapted to its natural environment.
We have seed collection contracts to fulfill, and waiting/notification lists to contact with updated inventory information. If we are lucky to have found seed for the species you’ve been waiting for this summer, we’ll let you know when we have it ready! Otherwise, just peruse our SHOP page and see what’s available and start dreaming up your fall seeding and planting plans now! August is the perfect time to start planing for fall seeding!
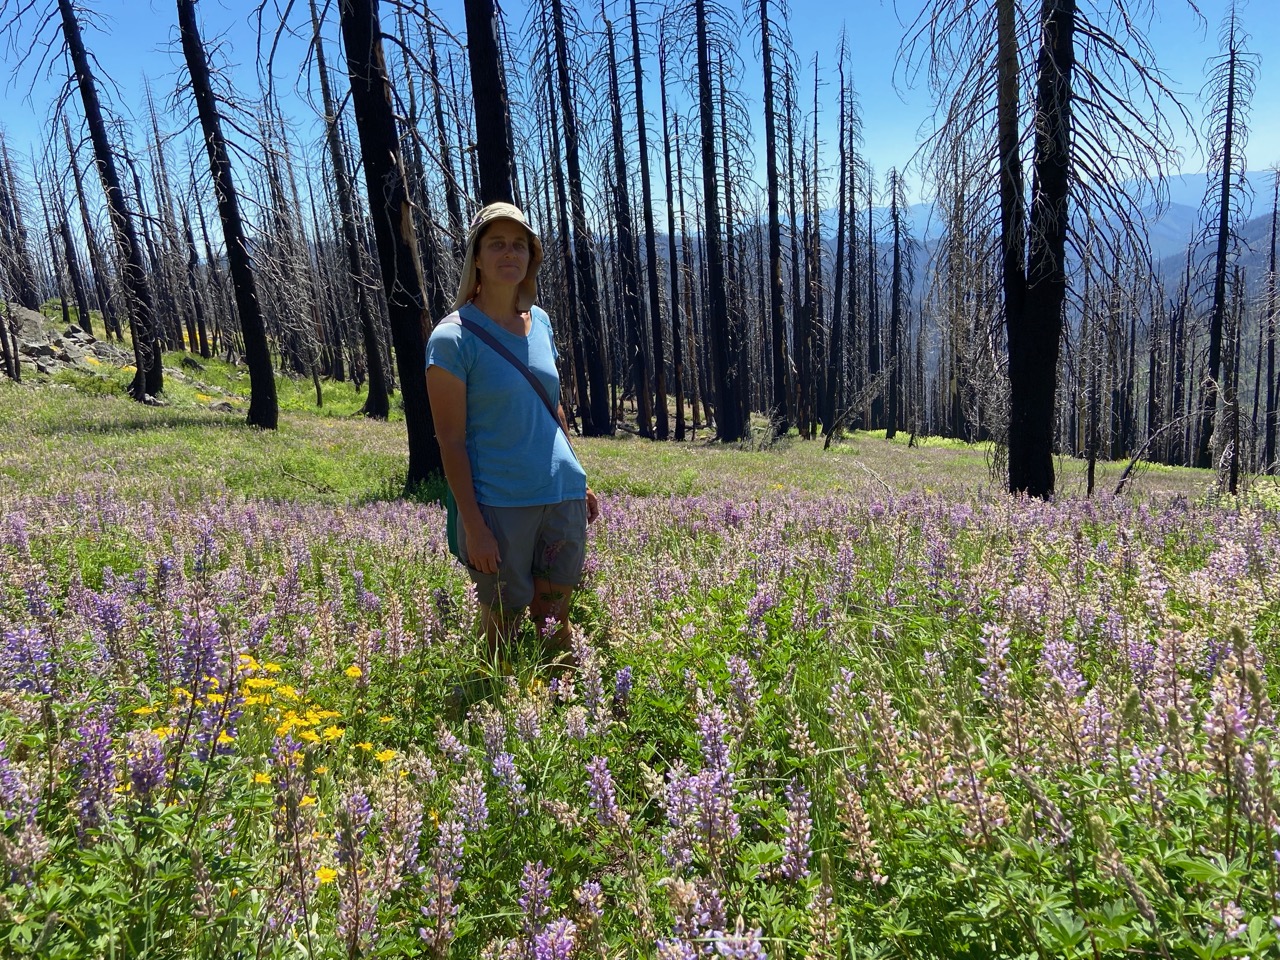
Luke in the Slater Fire super bloom near Bolan Peak on the Siskiyou CrestYolla Bolly Wilderness, CaliforniaSuzie in the Slater Fire super bloom near Bolan Peak on the Siskiyou CrestWe’ve had a great time exploring the region, meeting new native plant species we haven’t met before, and enjoying the amazing botanical diversity and wildflowers of the Klamath-Siskiyou region this summer! You have to get out and explore and see native plants in their natural habitat in order to better understand their ecology and how to grow them.
We want to thank everyone who contributed to pulling off this great event, and to all those who attended, including some very knowledgeable people about pollinators and native plant gardening from Oregon Bee Atlas and Jackson County Master Gardeners Association.
Special thanks goes to Troon Vineyard for having the vision to support the creation of a Native Plant and Pollinator Botanical Garden on their property as part of their Biodynamic and regenerative agriculture goals. You can visit the botanical garden during tasting hours at Troon Vineyard! Feel free to pop in and check it out, and watch the garden develop as it matures, as this is only year two of this exiting project, established mostly by direct seeding of native seeds from Klamath-Siskiyou Native Seeds.
A few scattered showers brought some gorgeous rainbows that accented the garden for the start of the tour!
Troon Native Plant and Pollinator Botanical Garden Tour Photo: Kristina LefeverCheckerspot butterfly resting on California poppy. Photo: Linda KappenSuzie Savoie of Klamath-Siskiyou Native SeedsTroon Native Plant and Pollinator Botanical Garden Tour Photo: Kristina LefeverBigelow’s sneezeweed with pollinating flyBigelow’s sneezeweed (Helenium bigelovii)Bigelow’s sneezeweed with checkerspot butterflyTroon Native Plant and Pollinator Botanical Garden Tour Photo: Kristina LefeverSulphur flower buckwheat (Eriogonum umbellatum)Checkerspot butterfly on sulphur flowered buckwheat Photo: Linda KappenCheckerspot butterfly on sulphur flowered buckwheat Photo: Linda KappenTroon Native Plant and Pollinator Botanical Garden Tour Photo: Kristina LefeverTroon Native Plant and Pollinator Botanical Garden Tour Photo: Kristina LefeverTroon Native Plant and Pollinator Botanical Garden Tour Photo: Joy SavoieHorsemint (Agastache urticifolia)Horsemint (Agastache urticifolia)Troon Native Plant and Pollinator Botanical Garden Tour Photo: Joy SavoieTroon Native Plant and Pollinator Botanical Garden Tour Photo: Joy SavoieCheckerspot butterfly resting on California poppy. Photo: Linda KappenCheckerspot butterfly resting on California poppy. Photo: Linda KappenTroon Native Plant and Pollinator Botanical Garden Tour Photo: Kristina LefeverTroon Native Plant and Pollinator Botanical Garden Tour Photo:
Kristina LefeverSilver lupine (Lupinus albifrons)Silver lupine and rainbowVelvet lupine (Lupinus leucophyllus)Broadleaf lupine (Lupinus latifolius)Troon Native Plant and Pollinator Botanical Garden Tour Photo: Kristina LefeverTroon Native Plant and Pollinator Botanical Garden Tour Photo: Kristina LefeverBarestem buckwheat and the Troon Vineyard tasting room in the backgroundBarestem buckwheat (Eriogonum nudum)Troon Native Plant and Pollinator Botanical Garden Tour Photo: Kristina LefeverTroon Native Plant and Pollinator Botanical Garden Tour Photo: Joy SavoieCheckerspot butterfly on Oregon sunshine (Eriophyllum lanatum) Photo: Linda KappenCheckerspot butterfly on Oregon sunshine (Eriophyllum lanatum) Photo: Linda KappenWestern verbena (Verbena lasiostachys)Troon Native Plant and Pollinator Botanical Garden Tour Photo: Kristina LefeverTroon Native Plant and Pollinator Botanical Garden Tour Photo: Joy SavoieCheckerspot butterfly on wild hyacinth (Triteleia hyacinthina) Photo: Linda KappenVinegarweed seedlings (Trichostema lanceolatum)Shaggy horkelia with the Troon Vineyard tasting room in the background.Shaggy horkelia (Horkelia congesta) and checkerspot butterflyRainbow over the Troon Native Plant and Pollinator Botanical GardenJunegrass (Koeleria macrantha)Giant blue eyed mary (Collinsia grandiflora)Alice eastwood’s fleabane (Erigeron aliceae)Oregon checkermallow (Sidalcea oregana ssp. spicata)Bumble bee on Oregon checkermallow (Sidalcea oregana ssp. spicata)
The Siskiyou Crest is a rugged, remote and spectacularly diverse mountain range straddling the border of northwestern California and southwestern Oregon. Little known, but incredibly wild and beautiful, the Siskiyou Crest is the only mountain range in the Pacific Northwest running east to west, connecting the volcanic Cascade Mountains to the Coast Range.
This vital habitat connectivity corridor extends from the sagebrush clearings and quaking aspen groves near Mount Ashland, to the fog drenched redwoods of the Smith River. From sagebrush to sea, the Siskiyou Crest is the axis for biodiversity on the West Coast and home to some of the most diverse conifer forests in the world.
In June 2019, partners Luke Ruediger and Suzie Savoie, co-owners of Klamath-Siskiyou Native Seeds, hiked nearly 200 miles through the wildlands of the Siskiyou Crest, starting on the Pacific Crest Trail at Interstate 5 near Siskiyou Summit on the western edge of the Cascade-Siskiyou National Monument above Ashland, Oregon, and ending 10 days later on the shores of the Pacific Ocean south of Crescent City, California. The journey traversed the beautiful Applegate River watershed, the headwaters of the Illinois River, the Smith River and many, many miles of the rugged Klamath River watershed.
We hope to bring you along on this visual journey across this wild and largely unknown region, through old-growth forests, lush mountain meadows, colorful rock gardens, and across the long, rugged spine of the Siskiyou Crest.
Although it’s taken us two years to put this video presentation together, it has been a labor of love, and has allowed us to share this journey with others who may never get to see it themselves, and deepen the understanding of the importance of the region.
Our route through the heart of the Siskiyous traversed two states, Oregon and California, five counties, two wilderness areas, three National Forests, including the Rogue River-Siskiyou National Forest, the Klamath National Forest, and the Six Rivers National Forest, as well as the Smith River National Recreation Area and Redwood National Park.
With a portable solar panel for charging our phones and cameras for filming our journey we hiked through long hot days, cold, misty mornings, persistent summer downpours and windy afternoons in the high country, then dropped into a thick marine layer of fog to the crashing waves of the Pacific Ocean.
Check out the film to learn more about the place we love and call home here at Klamath-Siskiyou Native Seeds, and see gorgeous, eye-candy photos of the incredible botanical diversity of the region!
For more information you can check out the Sagebrush to Sea: A Journey Across the Siskiyou Crestweb page or facebook page.
Come learn about native plant ecology, native plant propagation and gardening at the Troon Vineyard Native Plant Botanical Garden tour! Donations for the tour, taken on site, will benefit Pollinator Project Rogue Valley and the Siskiyou Chapter Native Plant Society of Oregon.
In December 2020 Klamath-Siskiyou Native Seeds installed a half-acre native plant and pollinator botanical garden at Troon Vineyard in the Applegate Valley. To date, 94 species of native plants have been established in the garden, primarily from direct seeding, with some native planting from nursery plants.
With paths and plant signs to guide you through the botanical garden, and views out towards the Applegate foothills and Grayback Mountain, the Troon Native Plant Botanical Garden provides an easy and delightful place to learn about native plants, pollinators, and a demonstration about how to incorporate more native plants into the farm and vineyard setting.
Suzie Savoie of Klamath-Siskiyou Native Seeds will walk tour participants through the paths of the botanical garden, providing detailed information for various species along the way, including:
Plant identification
Plant habitat in the wild
Pollinator ecology
Plant propagation and establishment methods in the garden
Two separate tour times will accommodate up to 25 registered tour participants for each time slot.
Tour #1
9am-10am
and
Tour #2
10:30am-11:30am
Please bring personal items for a warm, sunny June day and an optional picnic lunch to pair with an optional wine tasting after the tour. The Troon Vineyard tasting room opens at 11am.
Troon staff are also available for farm-wide tours to see the rest of the Troon biodynamic farm and vineyard, after the Native Plant Botanical Garden tour. These 1-hour tours will start at 10:15 & 11:45.
Check out the new species we have in stock! Click on the links below for more information. Every year we add new species to our wide selection of native seed packets. We hope you enjoy these new additions we’ve added over the last month. We are thankful for the incredible, world-class botanical diversity of the Klamath-Siskiyou region that allows us to offer such a wonderful diversity of native plant seeds native to our region. Here at KSNS we are committed to helping to protect, conserve and restore native plant communities for the benefit of biodiversity and the enjoyment of future generations. As spring wildflowers start blooming across the region we look forward to another great seed collection season this summer to help increase the availability of native plant seeds for a wide range of wonderful projects and customers who care about native plants. Happy Spring!
If you live in southwest Oregon, please join us for this upcoming in-person presentation hosted by the Talent Garden Club! Suzie Savoie of Klamath-Siskiyou Native Seeds will be covering a wide variety of drought tolerant native plants that will help your garden be more climate resilient.
If you live in southwest Oregon you’re invited to an upcoming free presentation by Suzie Savoie of Klamath-Siskiyou Native Seeds at the Applegate Library in the beautiful Applegate Valley on February 23rd at 2pm.
Come learn about the incredible botanical diversity of the Siskiyou Crest region through an in-person presentation, Wildflowers of the Siskiyou Crest, given by local Applegate naturalist, Suzie Savoie. This presentation will highlight rare, threatened and endangered species, as well as common botanical beauties. Suzie is owner of the local native seed company, Klamath-Siskiyou Native Seeds, is Conservation Chair for the Siskiyou Chapter Native Plant Society of Oregon, and is on the Advisory Board for Pollinator Project Rogue Valley. She has lived off-grid at the base of the Red Buttes Wilderness in the Upper Applegate for 20 years. Free and open to the public. Masks are required.