HEADS UP! This is a notification that we will be out of the office and unable to ship orders between July 24 to August 3. You can still place your order, but shipping won’t resume until August 3. Thanks for your patience! -KSNS
Last week, Suzie from Klamath-Siskiyou Native Seeds gave an online presentation for the OSU Extension Land Stewards Program, based out of the Southern Oregon Research and Extension Center in Jackson County.
Presentation description:This class presents basic skills for successful native seed collection, cleaning, and propagation to help you grow native plants to increase biodiversity and habitat on your land or in your garden. Topics include ethical native seed collection techniques, seed cleaning with basic home supplies, seed germination requirements for specific species, growing natives in nursery containers, and direct seeding techniques.
The presentation is about an hour and fifteen minutes, with some Q&A at the end. There is a few minutes of announcements by the Land Stewards host at the beginning of the recording, and the presentation begins about four minutes into the recording. Click on the YouTube link above to watch the presentation.
KSNS thanks the OSU Land Stewards Program for hosting this presentation, and for all the work they do to inform rural landowners in southwest Oregon about how to foster and support native plant communities.
As summer heat moves into cooler, moister fall weather, it’s time to start thinking of sowing the native seeds acquired this year. You may have collected and cleaned native seeds from plants on your own land or purchased some native seeds that are in a box in a drawer or sitting on your desk. The next step is to plan what to do with these seeds.
Fall to early winter is the best time to sow native seeds to help restore native plant communities, increase floral biodiversity for pollinators, and reduce invasive species. Native plants are known to support a greater abundance and diversity of bees, butterflies, and other wildlife compared to nonnative plants.
More and more people in the Applegate Valley and the larger region are wanting to increase both the quantity of native species on their land for higher quality wildlife habitat, as well as for community and cultural benefits such as native plant medicine, traditional foods, basketry materials, or to simply luxuriate in a more attractive and colorful landscape. With the right species selection, native plants also require much less watering.
Although it seems counterintuitive, the seeds of many native species germinate in the fall. Seeds respond to fall rain or dew that moistens the soil and triggers fall germination. This strategy enables these species to overwinter as a small rosette of leaves, ready to bolt and flower as soon as the weather warms in the spring. These cool-season species get a jump start on growth in the fall, putting energy into underground root systems and basal leaves through the winter.
In nature, wildflowers disperse their seeds onto the ground or into the air in the summer, and as fall rains begin, some of these seeds can germinate and grow rapidly during cool, rainy fall and winter conditions. Annual wildflowers are more likely to germinate and grow in the fall, but some perennial wildflowers and native grasses will as well.
In order to help these species achieve fall germination, the seeds must be sown outside just before the first fall rain to mimic the natural cycles of seed drop and germination in the wild. The warm fall soil temperatures and rain trigger seed germination. Sowing the seeds before the first significant fall rain enables them to have enough moisture to germinate before the temperatures turn colder in early winter.
The following are examples of native species whose seeds can germinate in the fall.
Annuals
Diamond clarkia (Clarkia rhomboidea)
Blue eyed mary (Collinsia grandiflora)
Bluehead gilia (Gilia capitata)
Bicolor lupine (Lupinus bicolor)
Shortspur sea blush (Plectritis congesta)
Perennials
Woodland madia (Anisocarpus madioides)
Western thistle (Cirsium occidentale)
California poppy (Eschscholzia californica)
Western buttercup (Ranunculus occidentalis)
Grasses
California brome (Bromus carinatus)
Tufted hairgrass (Deschampsia cespitosa)
Blue wildrye (Elymus glaucus)
Junegrass (Koeleria macrantha)
and more!
To prepare a spot for sowing native seeds, first remove existing weeds or grass without digging or tilling any deeper than a few inches. Deeper digging may unearth dormant weed seeds and encourage them to germinate, thereby increasing weed growth, which you don’t want. It is best to leave the deeply buried weed seeds undisturbed in a dormant state beneath the soil. If you have weedy rhizomatous grasses (e.g., crabgrass) or groundcovers (e.g., vinca or ivy), you will need to either solarize or tarp the area for at least one summer before seeding to clear the area of invasive plants.
For optimal results, sow seeds on a cleared area of soil, lightly rake the seeds into the soil, and then gently water. Since seeds need light and air, as well as contact with bare soil to germinate well, they won’t succeed if scattered directly over thick mulch or buried too deeply. The rule of thumb is to sow seeds as deeply as they are thick. You can cover seeds with a very light dusting of sifted potting soil, but keep in mind some seeds need light to germinate.
If there is a dry spell between rains in the fall, be sure to water! Seeds must receive regular moisture for optimal fall germination. Keep the soil consistently moist, but not waterlogged, as that can cause the seeds and/or seedlings to rot.
Other native plant seeds that don’t germinate in the fall should still be sown outside in fall to early winter to achieve the varying lengths of “cold-moist stratification” required for them to germinate in late winter to early spring.
Each fall we work as hard as we can to clean as much seed from the year’s seed collecting season as possible to get folks what they need for all their various native seeding projects. We still have a lot more seed to clean!
At the end of summer and on into late fall, native plants produce many different types of fleshy fruits that have different structures, such as berries, drupes, and pomes. Most people use the colloquial and scientific term “berry” as a general way to refer to fleshy fruits, even though that may not be the correct botanical terminology, depending on the species and fruit. Even still, it’s easy to just use the term berry as a catch-all term for all the colorful native fruits.
Collecting native berries is popular for food, natural dyes, beads, medicine, and many other reasons. Most likely you have a fond memory of picking wild, native berries at some point in your life: huckleberries, elderberries, currants, gooseberries and more!
Here at Klamath-Siskiyou Native Seeds, we spend a lot of time collecting native berries this time of year so we can supply the seeds of many different types of berry producing species. It’s a “berry exciting time of year!”
When berries are at their peak of ripeness we have to set all other seed cleaning aside to focus on getting the fruits collected and cleaned before the birds and wildlife beat us to them, before fall rains knock the berries off the plants, and before the berries either dry out or mold as the season progresses.
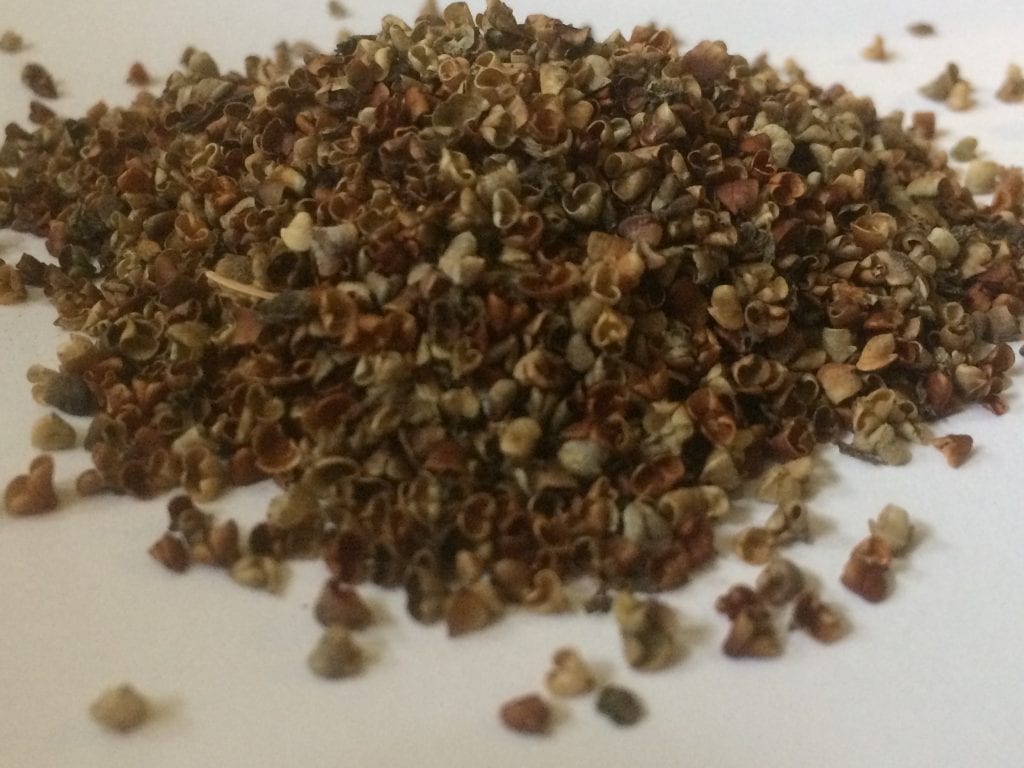
12 different species of berries collected in a couple seed collecting trips and waiting to be cleaned.
Although it creates a hectic, “collect them, clean them while you can” time period, this “berry time of year” is truly exciting. All the different colors, shapes and forms of native fruits we can collect in this area highlights the immense biodiversity of the Klamath-Siskiyou region that is home to a dizzying array of native plant species. From valley bottom chaparral and oak woodlands, to high elevation wet meadows and red fir forests, there are berry producing species that wildlife rely on for food and habitat.
Fruits are important for the evolutionary success of flowering plants because the fleshy fruit protects seeds, aids in seed dispersal, and sometimes even helps with seed germination. No matter the biological or evolutionary reasons berries exist, they are colorful, beautiful parts of the ecosystem that light up the forest or woodland with adornment and nourishment, and are something everyone can appreciate and enjoy for so many different reasons.
We hope you enjoy this “berry exciting time of year” as plants produce colorful fruits for the future, and as the weather shifts and plants go dormant, waiting for the burst of life next spring.
A selection of the fruits of our labor, from seed collecting trips are below. Now is a great time to sow seeds of berry producing species!
Suzie and her mom, Joy, collecting western redbud (Cercis occidentalis) seeds a couple weeks ago.
The summer seed collection season will be winding down over the next couple months as we shift into cooler, moister fall weather. This time of year we are usually too busy with seed collecting and cleaning to do much blog writing, but we wanted to share some highlights from this spring and summer before the summer slips away.
On May 23rdSuzie Savoie of Klamath-Siskiyou Native Seeds gave a presentation, Food Plants for Butterflies Part 2, for Pollinator Project Rogue Valley. This presentation highlights native plants that are beneficial for butterflies in southwest Oregon and northwest California. You can watch the Zoom presentation below to learn more about native plants that butterflies love!
On June 1st, Suzie gave a presentation, Growing Native Plants from Seed, for the Jackson County Master Gardeners Association at the OSU Extension meeting room in Central Point in southern Oregon. This in-person presentation covered the basics of growing native plants from seed using simple techniques for the native home nursery.
On June 17th Suzie and Luke gave a tour of the Troon Vineyard Native Plant and Pollinator Botanical Garden, at Troon Vineyard in the Applegate Valley in southern Oregon. Suzie and Luke from Klamath-Siskiyou Native Seeds helped create the project and are really pleased to share the abundance of blooms, butterflies and bees in the native garden! Below are some photos of the tour and videos of the pollinator profusion on a couple species of wildflower growing in the gardens: coyote mint and arrowleaf buckwheat!
On July 1stSuzie led the first of a two-part workshop on private, conserved land below Mt. Ashland in southern Oregon, where participants were able to tour Klamath-Siskiyou Native Seed’s seven year old native seeding project on the property, and learn about how it was established. Workshop participants learned to identify different species, as well as the specific growing requirements to grow them from seed. Participants also learned to identify and pull non-native plants that have seeded into the gardens, and some time was spent pulling weeds and talking about weed management and overall site maintenance. You can view the photos from Part 1 of the workshop at PPRV’s photo album from the day at the following link:
Part 2 of the workshop is coming up this coming weekend, and will be focused on seed collection, seed cleaning, seed sowing, and more hands-on activities. We’re looking forward to it!
On July 14-16 Klamath-Siskiyou Native Seeds (KSNS) sponsored the Siskiyou Crest Festival, organized by the Siskiyou Crest Coalition, that took place in Williams in southern Oregon. We were one of many businesses, non-profits, and individuals that chipped in to make the event a success! The event featured a series of field trips, speakers, poetry, an art show, and so much more! Luke from KSNS was part of a keynote speaker lineup at the event, with his presentation, The Siskiyou Crest: Relationships, Biodiversity & Connectivity. And Luke and Suzie led one of the free field trips on July 14th, as part of the Festival, up to Lily Pad Lake in the Red Buttes Wilderness.
Lily Pad Lake field trip in the Red Buttes, led by Luke Ruediger and Suzie Savoie as part of the Siskiyou Crest Festival.Luke Ruediger, keynote panel for the Siskiyou Crest Festival
And of course we continue to be out and about and in the field as much as possible collecting seeds to bring you the species you want to grow! Every year is different, with some species producing seed more than others, but every year we add new species to our offerings, and this year is no different. We’ve recently added the following new, late blooming wildflower species to our SHOP page:
If you live in southwest Oregon or northwest California, this upcoming workshop with Suzie Savoie of Klamath-Siskiyou Native Seeds will help you learn the basics of using native seeds for landscaping and habitat restoration. Topics will include seeding methods, plant ID, project maintenance, seed collection, and much more! You can register for this two-part workshop here.
After giving this presentation in person for the past two years at various events in southwest Oregon, Suzie recorded it on Zoom for folks to watch on video from the comfort of their own homes. Now that spring has arrived and wildflowers are blooming across the region, it’s time to grow our shared appreciation for the botanical biodiversity of the Siskiyou Mountains! Many of the species covered in this presentation are still buried under feet of snow from this winter’s amazing snowpack, so start dreaming of seeing these flowers this summer! In the meantime, this presentation does cover species from low and mid elevations as well, so check it out and get out and enjoy the flowers this spring and summer!
Oregon Native Plant Appreciation Month is celebrated throughout the month of April, and in celebration Suzie Savoie and Luke Ruediger of Klamath-Siskiyou Native Seeds will be giving multiple presentations to provide inspiration for the conservation of native plants and pollinators. If you live locally maybe we’ll see you there!
California Native Plant Week is April 15-22, 2023. Just before that Luke and Suzie will be in Arcata, California , on April 12th, to do a presentation about their local film, Sagebrush to Sea: A Journey Across the Siskiyou Crest for the North Coast (CNPS) California Native Plant Society.
It’s still winter but many native species are eager to get a jump start on growth by germinating during some of the coldest months of the year. It’s February and the nights are getting down into the low 20s and we continue getting dustings of snow off and on at our backwoods homestead at 2,200′ elevation in the Siskiyou Mountains, but little seedlings are still emerging during these cold, wintry conditions, roused by the necessity to get roots established quickly before the summer drought season arrives.
Some native species have seeds that germinate in the fall with early fall rain, and the seedlings remain small and don’t put on any above ground growth during the winter, waiting for a quick spurt of growth in the spring. Winter germinating species, on the other hand, start to germinate as the first tinges of spring arrive, when buds on dormant trees and shrubs start to swell, and the earliest blooming wildflowers are emerging from frozen or rain soaked ground on sunny winter days.
Shortspur seablush (Plectritis congesta) germinating in early February 2023
Some of these native seeds have germinated in winter only after some necessary duration of cold-moist stratification, while others may have germinated more than a year after the seeds were initially sown, having chose not to germinate the first year, but rather wait until the following winter. Some annual species that don’t have any pretreatment or cold-moist stratification requirements will also germinate during the cold winter months, getting a jump start on growth because they need time to grow, flower and set seed in one growing season.
Here at Klamath-Siskiyou Native Seeds, we pride ourselves on growing most of the native species we sell seed for in order to test seed germination and understand the growing requirements in the nursery setting or in the direct seeding environment. There’s no better way to understand native seeds than to collect, clean and grow them! Growing native plants from seed is a satisfying and joyful endeavor like no other. It helps one get to know native plants better, how they grow and how they function in the larger ecology of the region. In this case, it helps us understand which species will germinate in the fall, winter or spring, or which species will grow whenever the hell they want to — because if we’ve learned anything, it’s that we always have more to learn, and native plant seeds will surely surprise you! We love having a small nursery to test out seed germination, seedling growth, and general growing requirements to help better serve our customers and answer questions they may have about our seeds.
The following is a photo essay of the native seeds germinating in early February 2023 in the Klamath-Siskiyou Native Seeds nursery.
Watch Creating the Troon Vineyard Native Plant & Pollinator Botanical Garden presentation on Vimeo here!
Happy New Year!
The new year brings new opportunities to sow native seeds, and right now is a great time of year to sow native seeds! Watch this inspiring and instructive Zoom presentation by Suzie Savoie, co-owner of Klamath-Siskiyou Native Seeds, to help kick start your own native seeding or planting project.
In December 2020, Klamath-Siskiyou Native Seeds installed a one-half-acre Native Plant and Pollinator Botanical Garden at Troon Vineyard in the Applegate Valley in southwest Oregon that includes over 100 species of native plants. Primarily established through direct seeding, with some use of potted native nursery plants, the garden provides an opportunity to learn about native plants in a scenic, organic, and biodynamic vineyard setting that is open to the public. This presentation focuses on how, in two years, the space went from bare ground to a botanical garden with paths, a small meadow, and blocks of species highlighted with plant signs. Lessons learned are explored and specific species information is provided.
Suzie has given this presentation through Zoom in November 2022 for the Jackson County Master Gardener’s Association’s Winter Dreams, Summer Gardens Symposium, and in December 2022 in person at the Troon Vineyard tasting room. She later recorded the Zoom presentation in order to make it freely available online, so you can watch from the comfort of your own home, and start dreaming up your own native seeding and planting projects!
We hope this presentation helps inspire you to Grow Native – Grow Wild!
Slides from the presentation, Creating the Troon Vineyard Native Plant & Pollinator Botanical Garden
The McKinney Fire burned a portion of wooden fence and irrigation in one area of the native planting project at KRC.
As winter weather draws us indoors this time of year, it gives us time to reflect on some important experiences and learning opportunities in 2022, including this summer’s McKinney Fire, which tested the fire resiliency of our native planting and seeding projects at Klamath River Club on the Klamath River in northern California.
This summer one of Klamath-Siskiyou Native Seeds’ long-term native seeding and planting projects interacted with the McKinney Fire on the Klamath River in northern California, and it made it out pretty good, showing that growing native plants for the benefit of pollinators, wildlife, birds and native plant conservation can be an integral part of hardening your home and creating a fire resilient landscape on your property.
Wildfire is an elemental part of the ecological landscape of the Klamath-Siskiyou region, and it interacts with and impacts human communities in many different ways. The lives of most everyone who lives in the Klamath-Siskiyou region are touched in some way by wildfire, and will continue to be.
KRC structures with native plant landscaping made it through the McKinney Fire. You can see the visible fire effects from the McKinney Fire on the slopes above KRC. The fire moved through the property with no one there to fight the fire, but many structures and most of the native plantings and seeded areas remained unburned.
In many ways, the work we do at Klamath-Siskiyou Native Seeds is dependent on wildfire, as many of the species that we collect seed of and supply seed for are invigorated and nourished by wildfire, and some are truly dependent on wildfire for their survival and regeneration. We also do a lot of our seed collection in the post-fire environment, usually 2-3 years after it burns, as that is when herbaceous plants have put on extraordinary growth and flowers in the post-fire environment, making the access to an abundance of seed much easier to locate.
KRC river access area deck overlooking the Klamath River before (May 2022) and after (August 2022) the McKinney Fire.
Where we live and work at the base of the Siskiyou Crest near the Red Buttes Wilderness, has experienced many wildfires in the last 20 years, including the 38,000-acre Abney Fire that burned in 2017 in our canyon for two months, creeping around mainly in the understory and replenishing the forests, woodlands and meadows with a long suppressed natural process.
Our family is lucky enough to have experienced low-intensity, understory wildfire next to our home with little threat to our structures or safety; however, our family has also experienced the devastating loss of a home to wildfire when Luke’s Mom’s home burned in the fast-moving, wind-driven Almeda Fire in Talent, Oregon in 2020. This fire destroyed 2,300 homes and killed three people. Luke’s mom will always live with the trauma and grief of losing so much so quickly, including sentimental and historic items that meant so much to her.
Photos from KRC showing some McKinney Fire burned areas in the foreground within or near the native seeding and planting project areas, as well as the fire effects on the slope above.
Klamath River Club is located along the Klamath River near the town of Klamath River, and at the northern edge of the McKinney Fire footprint, in between the fire and the northern spot fire that occurred north of the river that was discontinuous with the main body of the fire.
Yet, after many years of working on habitat restoration and native seeding and planting projects, for the first time, one of our project areas was tested by wildfire this past summer on the Klamath River. Our lives and work were again touched by wildfire, but in a different way this time. One of our long-term native seeding and planting projects at the private fishing retreat, Klamath River Club (KRC) on the Klamath River was partially burned in the 66,000-acre McKinney Fire.
The McKinney Fire was a dramatic semi-natural event, ignited by downed powerlines, burning through significant private industrial timber lands and fueled by explosive fire behavior, strong winds, collapsing pyrocumulus plumes and sudden, extreme rain events. The McKinney Fire tragically killed four people and destroyed at least 185 structures, including most of the town of Klamath River, California.
Started by sparking Pacific Power power lines, the fire quickly roared to life during an unprecedented heat wave and wind event. According to temperature gauges at KRC, the area experienced a record temperature of 116 the day the fire started, and in less than 24 hours the fire roared through the small settlement of Klamath River, burning many homes, trailer parks, the Klamath River Community Hall, a building that housed archives for the Karuk Tribe and the post office. When it reached KRC no one was there, not even fire crews, as they were busy with emergency evacuations, trying to save lives and get people out of the fire area. Crews were also focused on implementing structural protection along Hwy 96 with limited resources and under dangerous conditions, attempting to protect homes at the heart of the small hamlet of Klamath River. The McKinney Fire moved through the KRC property for an estimated 12 hours with no one there, and burned without the influence of fire suppression activities, showing how the fire naturally interacted with the human infrastructure, native plant gardens and habitat restoration projects.
Some silver bush lupine (Lupinus albifrons) and a portion of a native hedgerow burned in this area of KRC where native planting and seeding had taken place. As you can see though, the fire stopped spreading on its own and didn’t burn the entire area.
Thankfully KRC was developed with wildfire in mind, as owners Tom and Annette had previously lost a home to wildfire during the Oakland Firestorm of 1991 in Oakland, California, a deadly and devastating fire that killed 25 people and burned 2,843 single-family dwellings and 437 apartment and condominium units. Because of this past experience, Tom and Annette helped residents impacted by the Almeda Fire by gathering donated items from people in Oakland, California to help those who lost their homes during the Almeda Fire in the Rogue Valley years later. These experiences also helped inform the management choices they made at KRC while developing the human infrastructure, landscaping and defensible space around the property.
As part of the habitat restoration work at KRC, the first project was blackberry removal, followed by riparian tree and shrub planting along the river. This took place in between the river and structures, starting in 2017. This early decision to implement invasive blackberry removal along the river corridor adjacent to the developed portions of the property, and the emphasis on native riparian plants, was probably the most important factor that contributed to KRC surviving the McKinney Fire with only some losses. Blackberry removal and maintenance has continued at KRC near the homes and structures every year since 2017, keeping blackberry growth to a minimum and reducing fuels less than 100′ from structures and human infrastructure on the property.
Invasive blackberry made this area along the Klamath River burn hot on the upstream part of the KRC property.One wall tent burned, and another survived during the McKinney Fire at KRC on the downstream part of the property.
Along the Klamath River in this portion of KRC extensive blackberry removal had taken place. As you can see, none of the riparian vegetation burned in this location, protecting the tiny house and native oak trees from burning.
As you can see in these photos, areas along the river that were still colonized with dense thickets of blackberries burned completely to the ground. Yet, where blackberry had been removed, the native riparian vegetation was largely unscathed and the reduction in fire intensity likely led to a decrease in residual heat and ember shower effecting the adjacent structures. The gray willow that dominates the Klamath River corridor, and native willow in general, is very fire resilient and is stimulated by wildfire, so it burning in and of itself is not problematic; however, it burning near structures and sending up embers that can help ignite nearby infrastructure does make a difference. So, in this scenario, removing the invasive blackberry and encouraging native trees and shrubs made the structures at KRC more fire resilient, reduced fire activity on the property and reduced the severity of the fire. It also essentially stopped the fire and may have saved much of the human infrastructure at KRC.
Invasive Himalayan blackberries had not been removed from this part of the river vegetation, and the area burned hot as the blackberries burned, burning most of the gray/coyote willow, but thankfully only one of the canvas wall tents burned in this area.
In all, the main structure, the bathhouse, a large outdoor kitchen/pavilion area, multiple large canvas wall tents on platforms, the pump house, the outdoor shower, and the garage structure all made it out just fine as the fire moved through the property. Some losses included two metal containers used for tool storage where the entire contents burned. The metal structures concentrated heat and baked the contents from the inside out. Although the metal containers did not burn, their contents were incinerated. Additionally, two canvas wall tents on platforms, and a woodshed with four cords of wood were burned. Compared to many who lost everything in the McKinney Fire, KRC made it out pretty good, with much to be thankful for.
The McKinney Fire arrived at Klamath River Club at 10:22 am on the morning of July 30th, on the second day of the fire. You can see the flames approaching from downstream.
The day the fire started Tom and Annette watched the fire burn remotely from their security cameras. The images were devastating that night as the dark images showed fire moving through the property and flames burning in different areas. As they went to bed that night, they thought KRC was going to be a total loss, but the morning daylight revealed that much of KRC made it through the fire, and some of the impressive flames and images from the night before was the firewood shed on fire, making it appear much worse than it actually was.
When Tom was finally able to return to KRC and visit the property with CALFIRE staff, they told him that the work he had done to create defensible space using native plants and removing blackberries had helped save the structures at KRC. Klamath-Siskiyou Native Seeds had done a lot of this work, and we are proud to have helped KRC be more fire resilient during the McKinney Fire.
The McKinney Fire burning through Klamath River Club at 8:31pm and 10:00pm on the evening of July 30th. The morning of July 31st, after the McKinney Fire moved through Klamath River Club.
As the McKinney Fire moved through the property it partially burned some of the native plantings, but most of the areas that we had planted and seeded remained completely unburned. As mentioned earlier, areas along the river treated to remove invasive blackberries stayed lush and green with primarily native gray willow (Salix exigua), but also some Oregon ash (Fraxinus latifolia), white alder (Alnus rhombifolia), incense-cedar (Calocedrus decurrens), white oak (Quercus garryana) and black oak (Quercus kelloggii) survived the fire. In the understory of these larger, established plants grow smaller native plantings, including a mixture of native trees and shrubs, that were also unscathed during the McKinney Fire.
A newly planted native hedgerow partially burned, but many plants survived.Western thistle (Cirsium occidentale) burned in the seeded native meadow.Klamath plum (Prunus subcordata) burned on the edge of the native plant garden.
Along the road going through KRC some metal containers that stored tools were burned and removed from the site already at the time of this photo. You can see the established native hedgerow made it out fine, along with the pump house and tiny house.
There are a lot of factors that determine the intensity of a wildfire, and whether or not structures or vegetation will burn, but one of the major factors near homes is wind and ember shower. Thankfully all the structures at KRC have metal roofs which help prevent ember ignition. Embers did ignite a few places in the native plantings at KRC during the McKinney Fire, but they mostly just smoldered around in the bark mulch and burned up some of the plantings in a few areas. Probably less than 5% of the areas planted and seeded with native plants burned, and only a small fraction of that was negatively impacted. Well established plants sprouted back really quickly after the fire; whereas, some shrubs and perennials that were not well established, and were only planted a year or two ago, didn’t come back after being burned.
Being resilient to the fire allowed the native gardens and habitat at KRC to act as an oasis in an area which burned pretty hot overall in the McKinney Fire, providing valuable pollen and nectar for endangered monarch butterflies and other pollinators and wildlife within the fire footprint. Monarch butterflies used the milkweed in the native plant gardens at KRC throughout the summer and early fall at KRC, nectaring on the flowers, laying eggs on the plants, caterpillars munching on the leaves, caterpillars eclosing from chrysalises on the plants, and producing more monarchs and that will help the imperiled western monarch butterfly population.
Monarch butterfly caterpillars using the showy milkweed (Asclepias speciosa) that is very abundant in the KRC native plant gardens. The gardens primarily didn’t burn during the fire, so abundant milkweed remained for monarchs to use in the post McKinney Fire environment.
Additionally, naturally occurring showy milkweed on the property that burned in the fire was growing back and pushing new growth within weeks of the fire.
Showy milkweed (Asclepias speciosa) resprouting at KRC on August 23, 2022, just 23 days after the McKinney Fire moved through the area.
Overall, the impacts to human infrastructure and native plantings at KRC were minimal, showing that native plantings, the removal on non-native species and the maintenance of defensible space had a positive effect on the overall impact of the McKinney Fire at KRC. .
The plants that didn’t make it through the fire were replanted this fall and efforts at KRC will continue focusing on native plant restoration, native plant gardening, defensible space and home hardening that will beautify the property, provide valuable pollinator and wildlife habitat, and help KRC weather the next fire storm. Living with wildfire takes preparation and thoughtful management of your surroundings, it also requires a little luck. KRC was both lucky and prepared, allowing the property to continue thriving with wildfire on the Klamath River. Fire is an inevitable part of life, but losing homes, structures and infrastructure is not inevitable if we work to adequately prepare homes and communities with defensible space and home hardening.
One wall tent that burned and one wall tent that survived at KRC.Burned wall tent and fire mosaic.Native mugwort sprouted back right away along the Klamath River at KRC.
The McKinney Fire burned along the Klamath River in this photo (on left), but stopped itself at the path and even with ember showers, didn’t burn the native seeded meadow in the foreground of this pine tree. Even though one of the canvas wall tents behind the tree did burn, another in the distance didn’t burn.
For more information please check out the following: